thought processes

I collect strategies for creating without over-thinking process or materials. It is pretty clear to people who make things for a living (Brian Eno, Twyla Tharp) that the physicality of the product has to be mirrored by the physicality of the process, and too much thinking tends to stilt both.

To that end, I have collected a pile of prompts and precepts that I use to poke myself out of a creative rut. The most recent is Brian Eno’s Oblique Strategies, which you can find online daily over here. Today’s missive said “What were you really thinking about just now? Incorporate.”

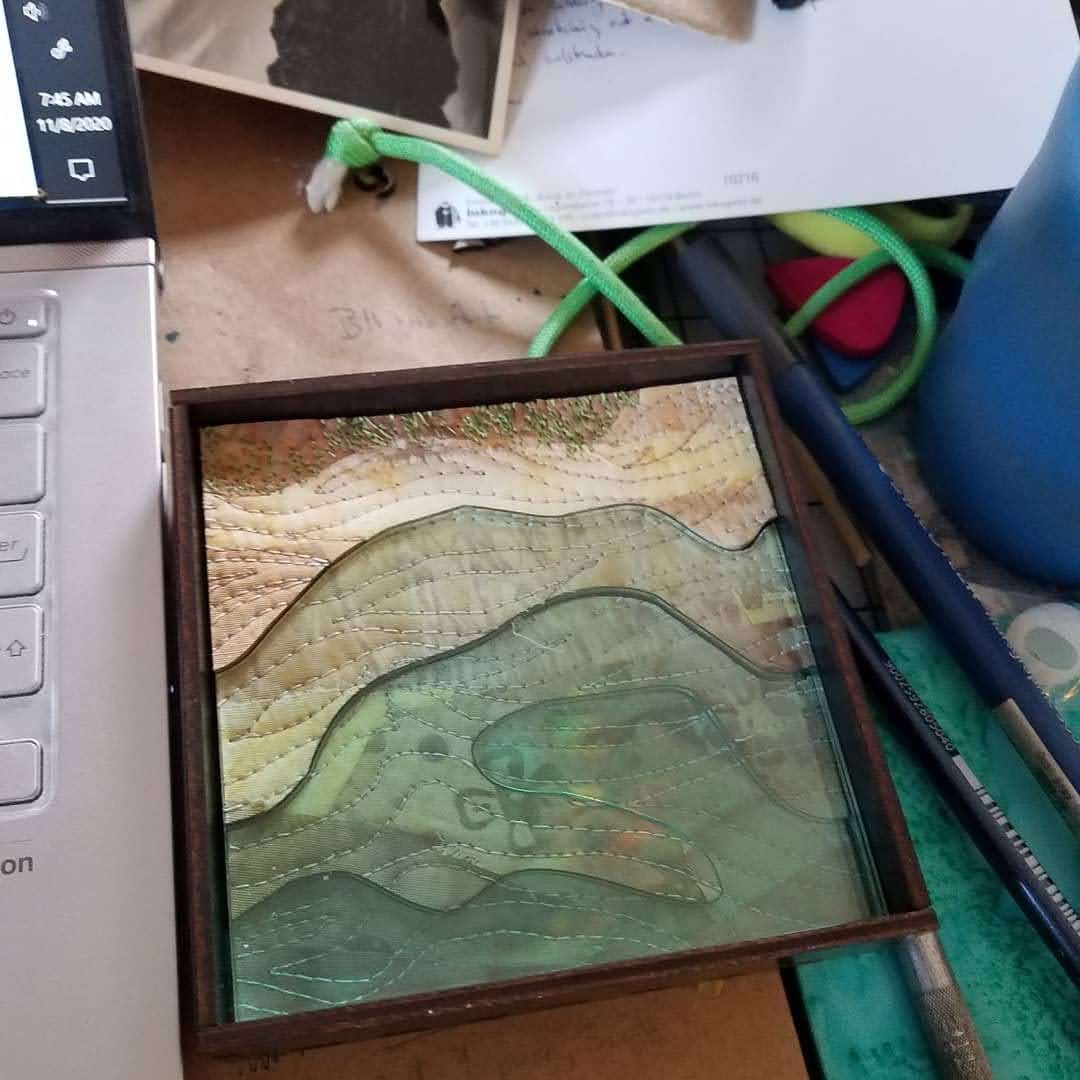
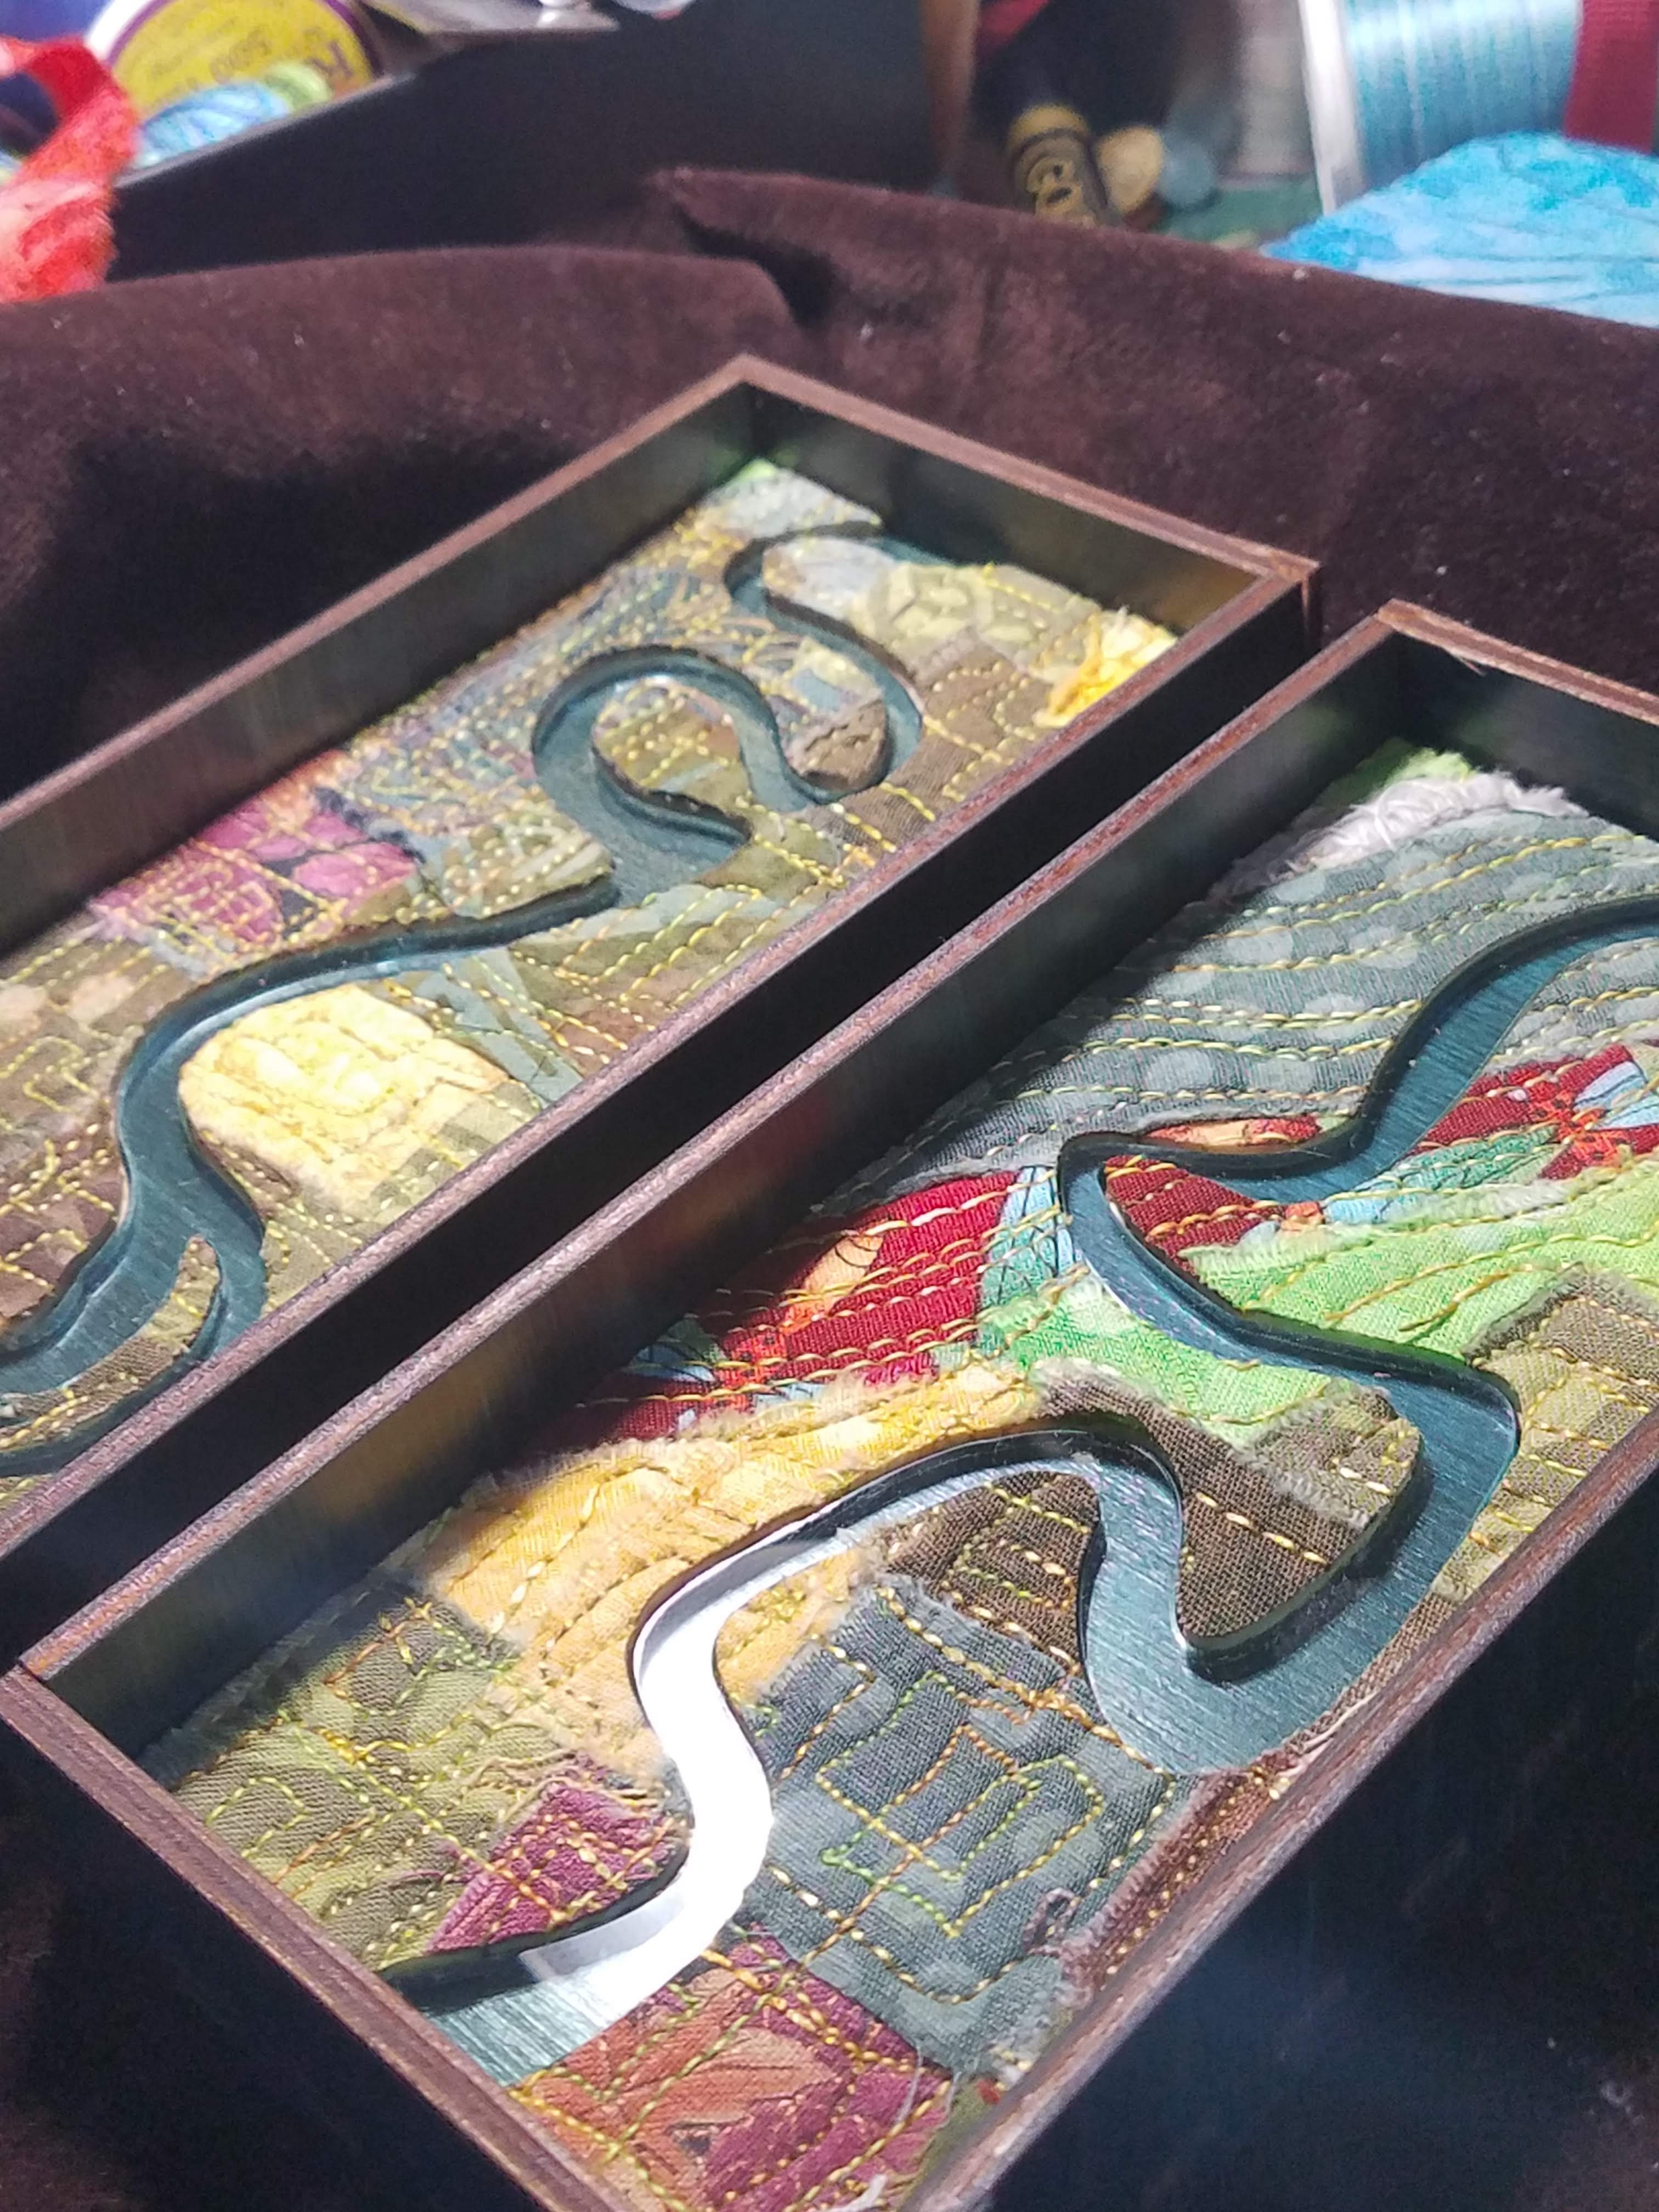
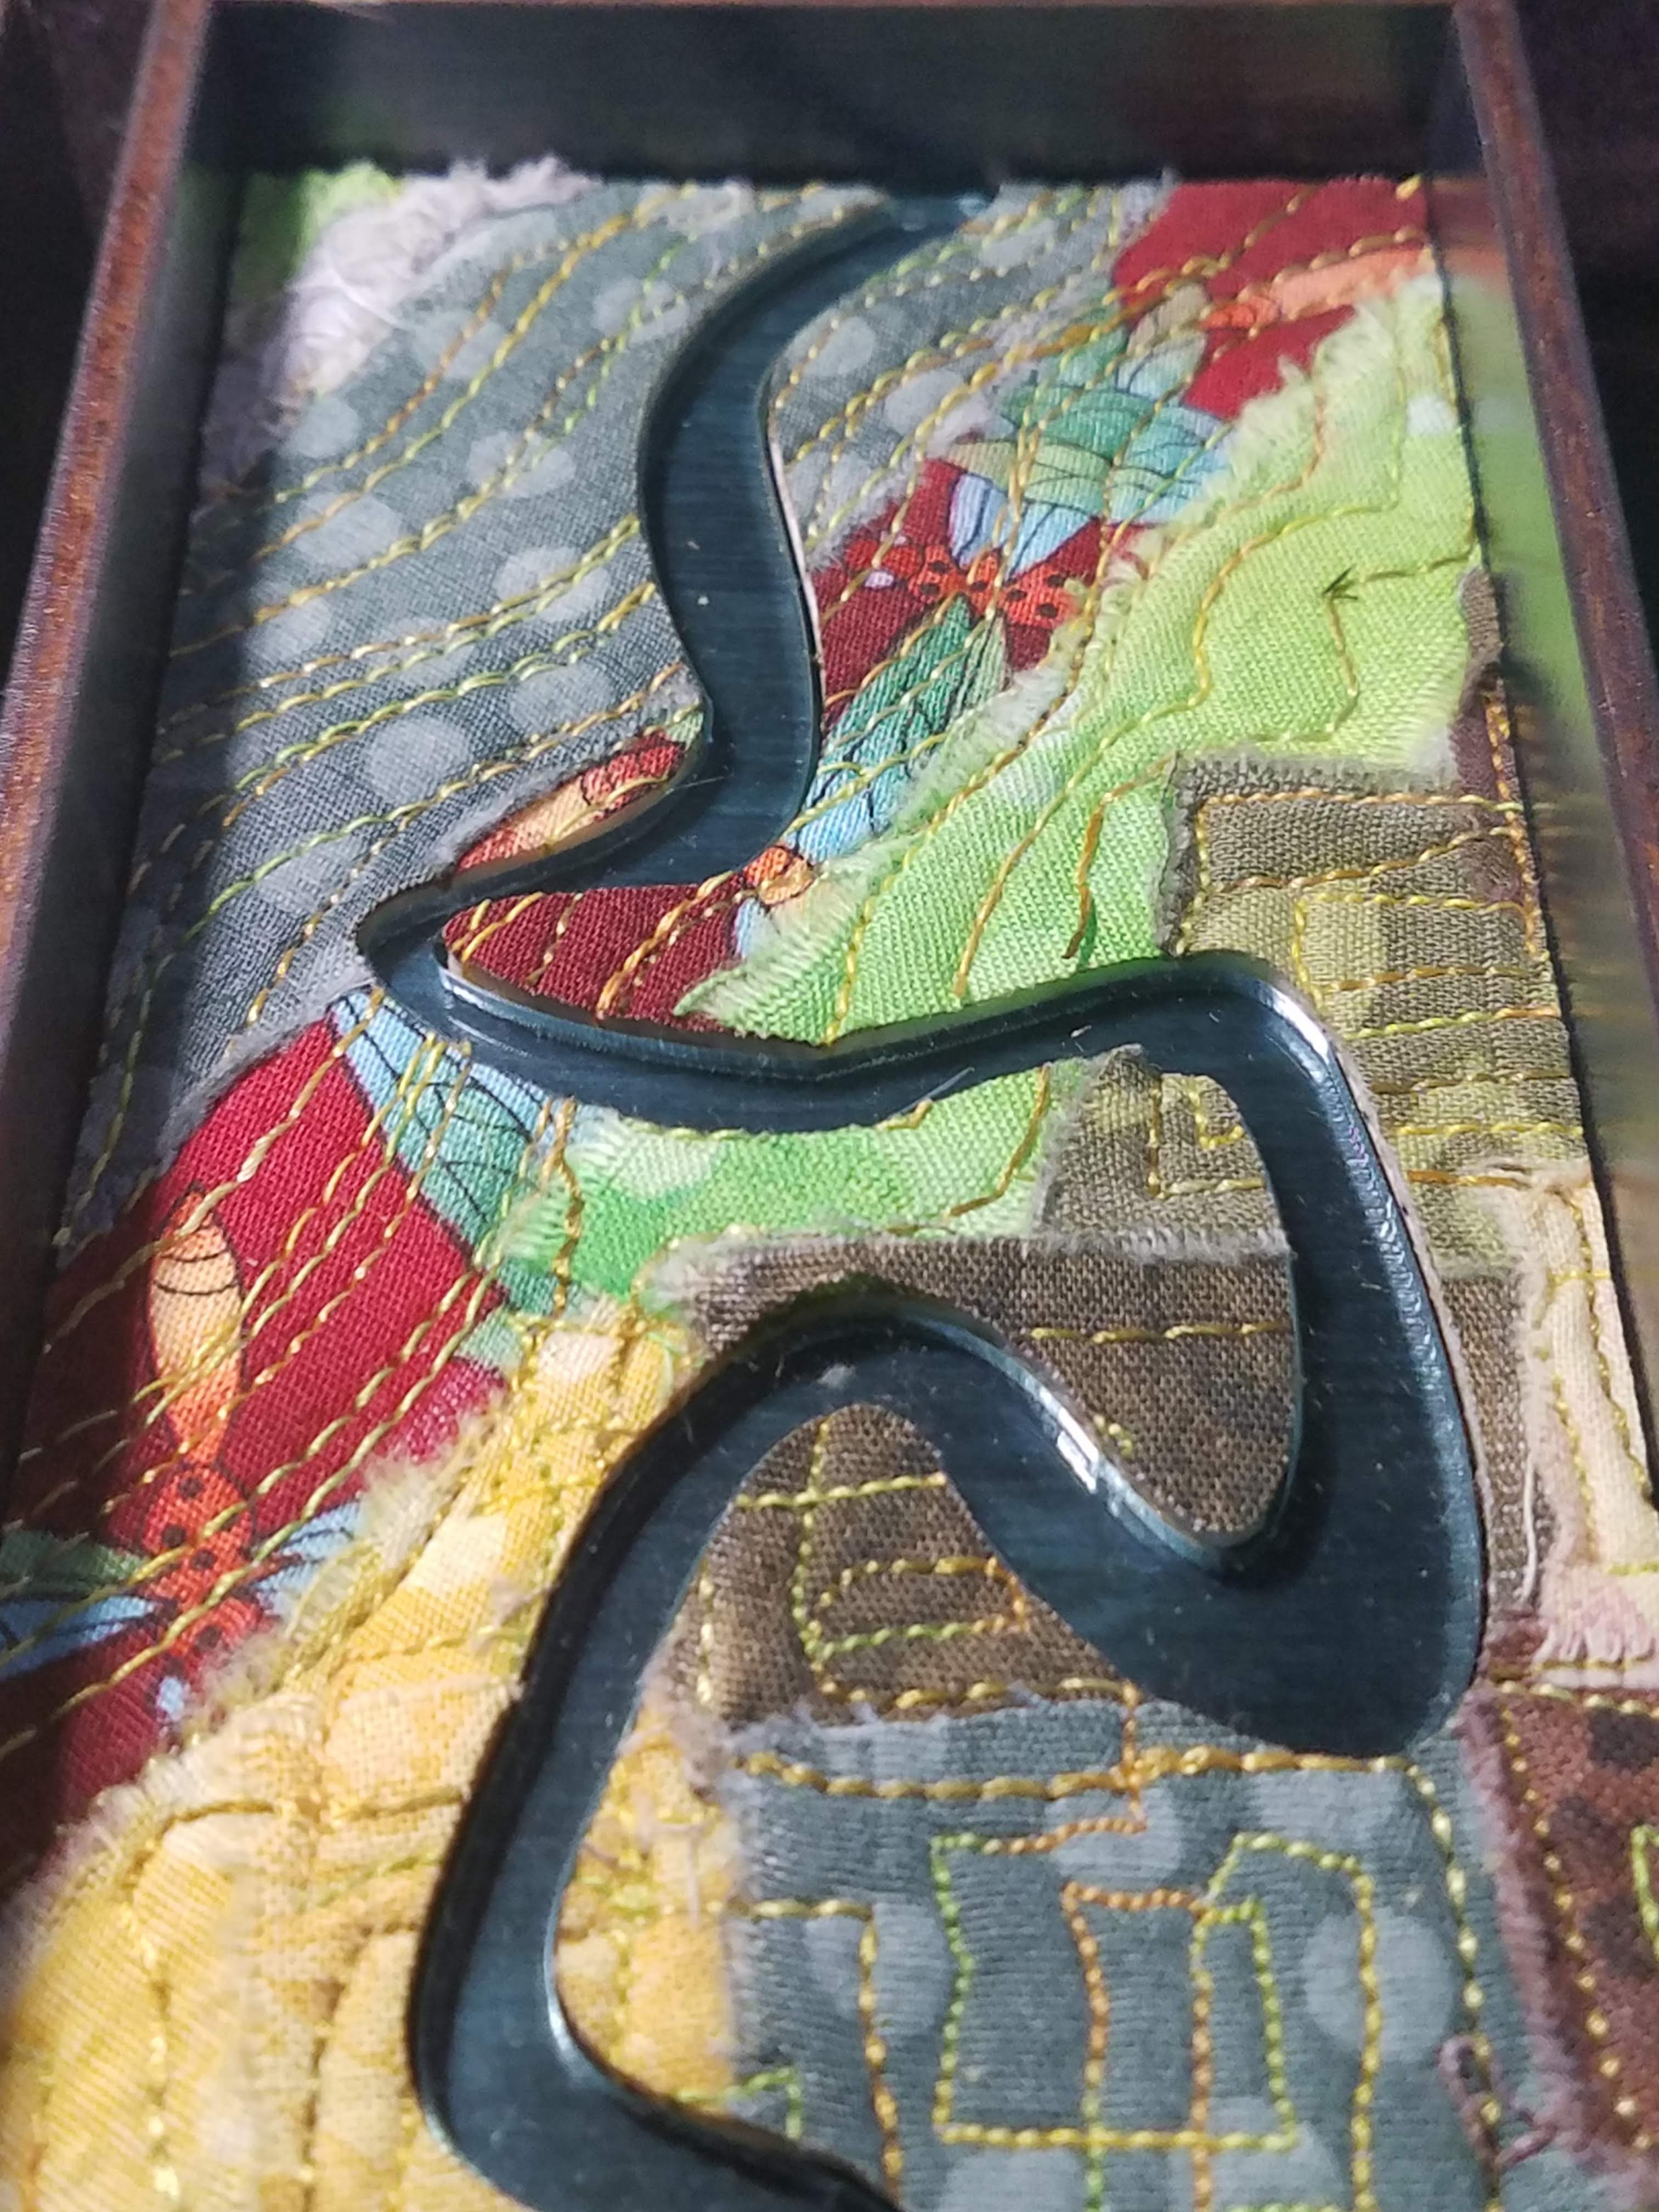
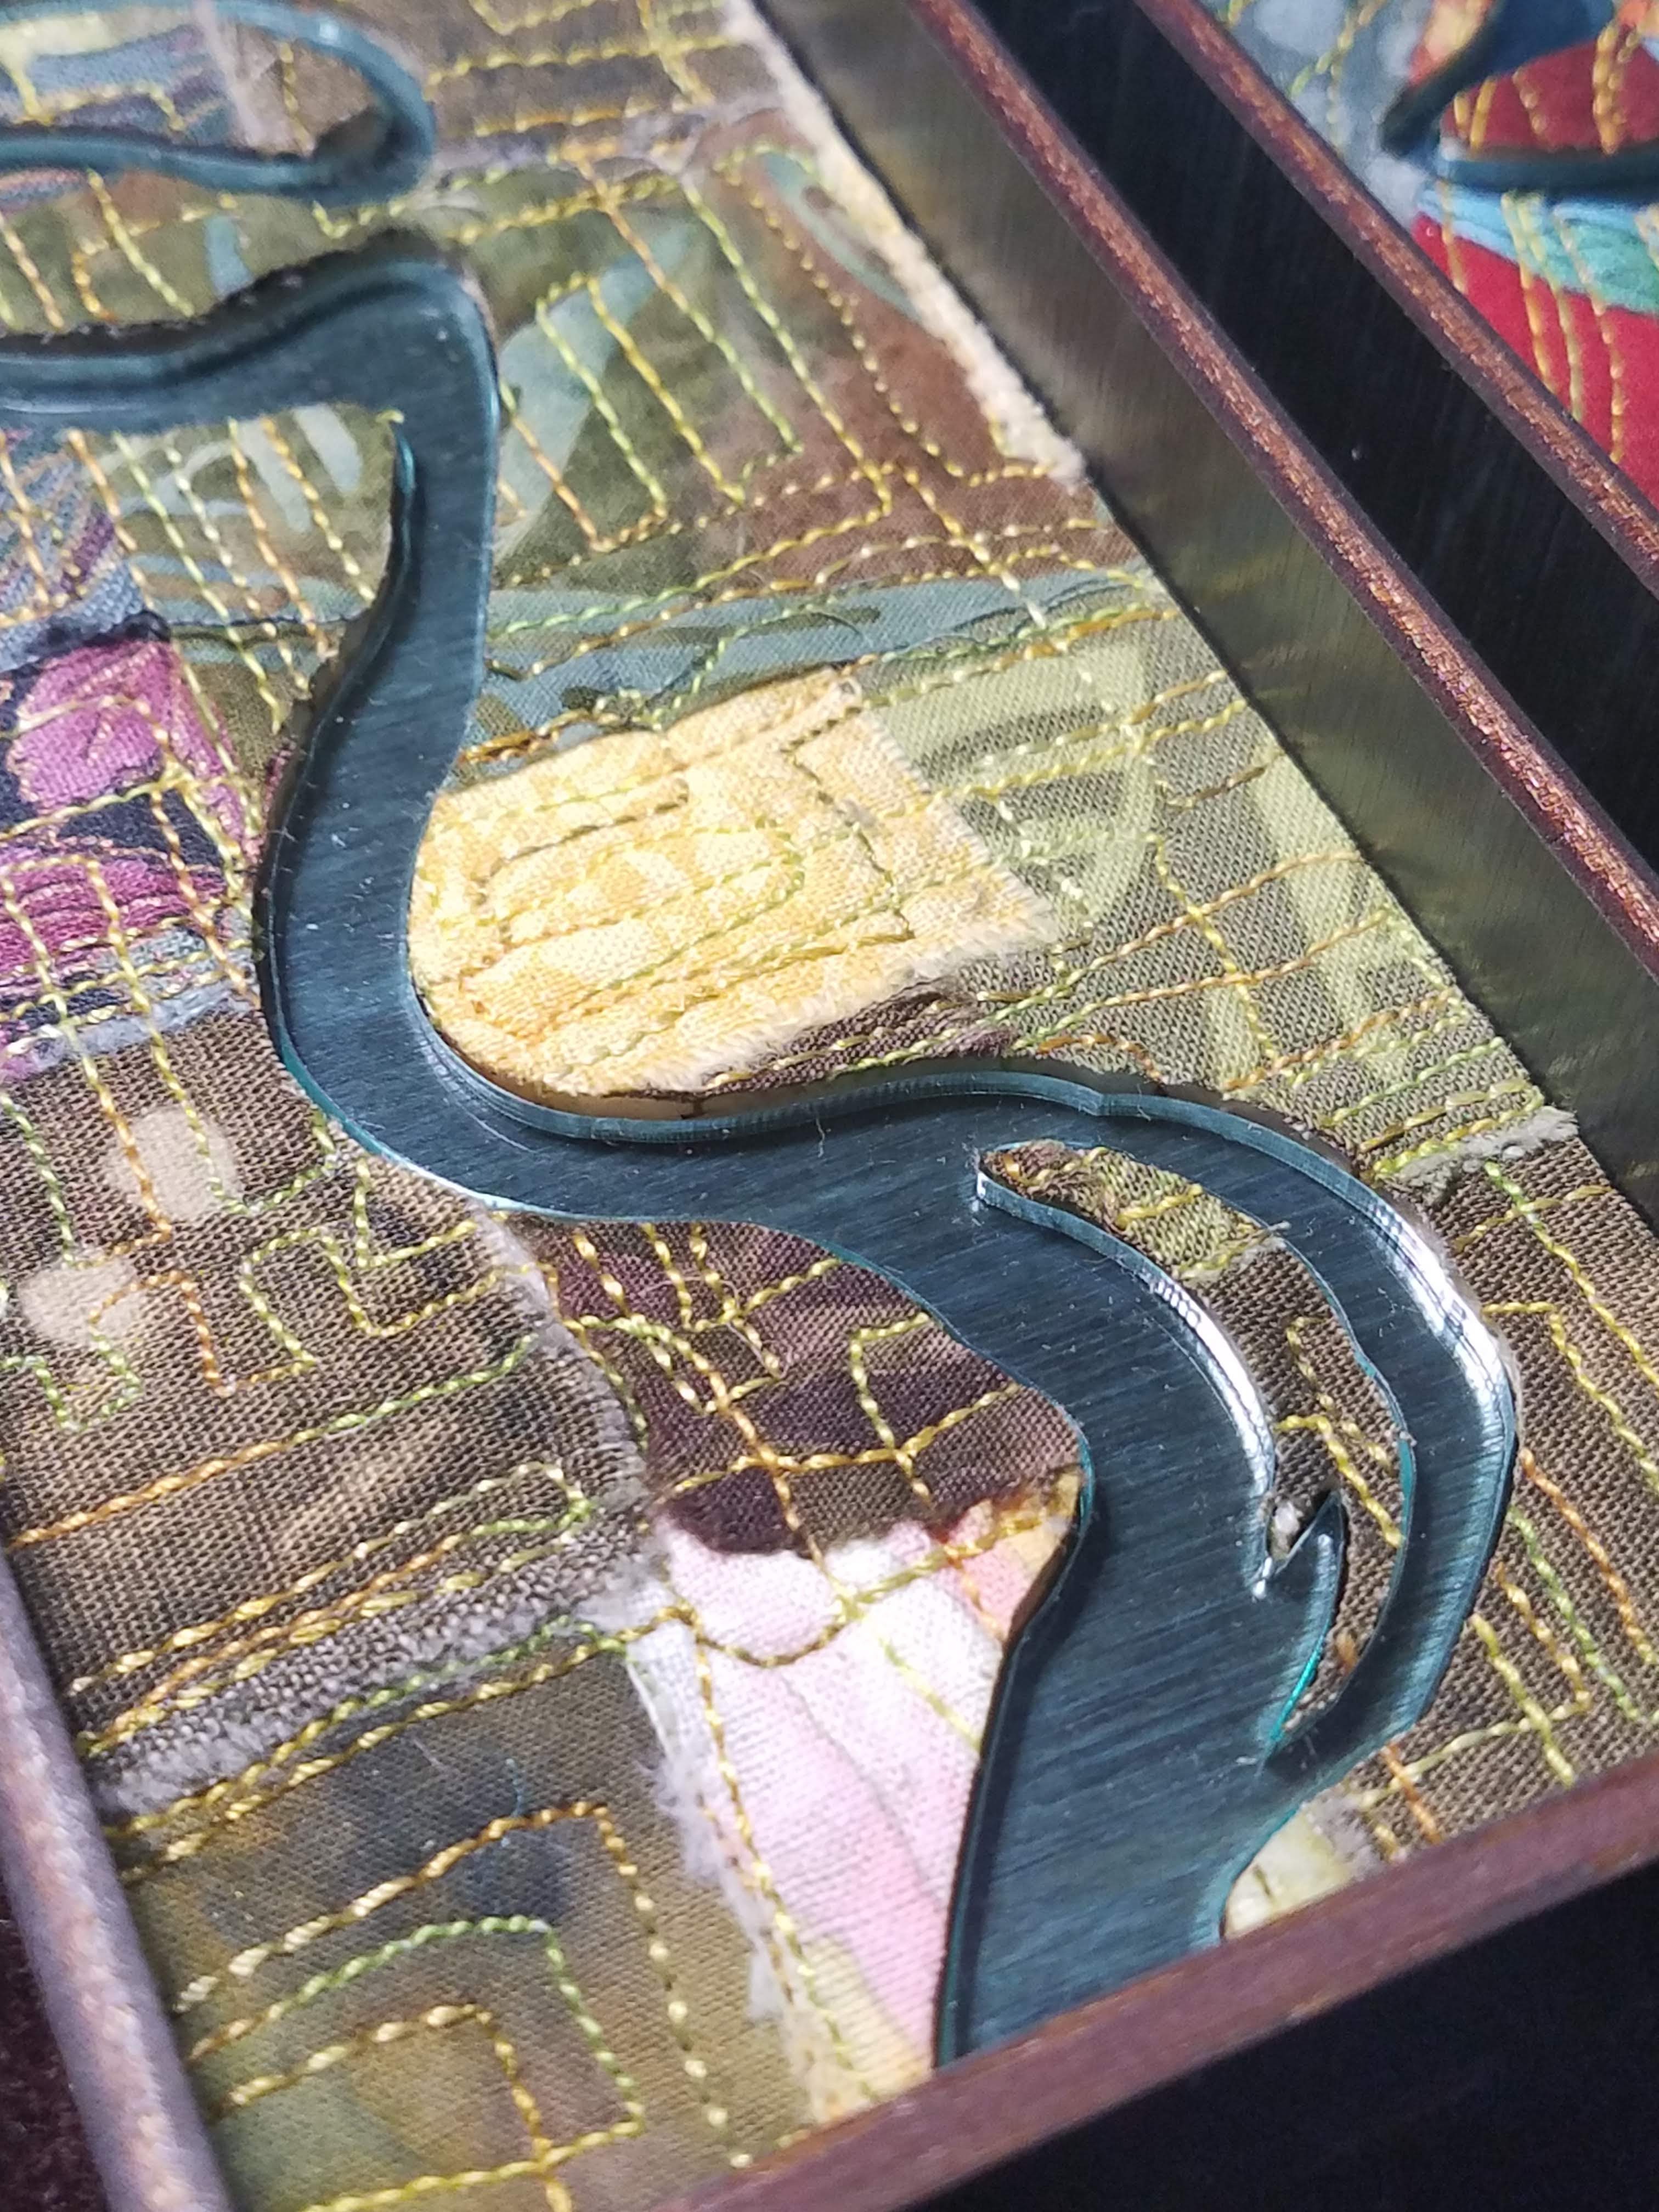
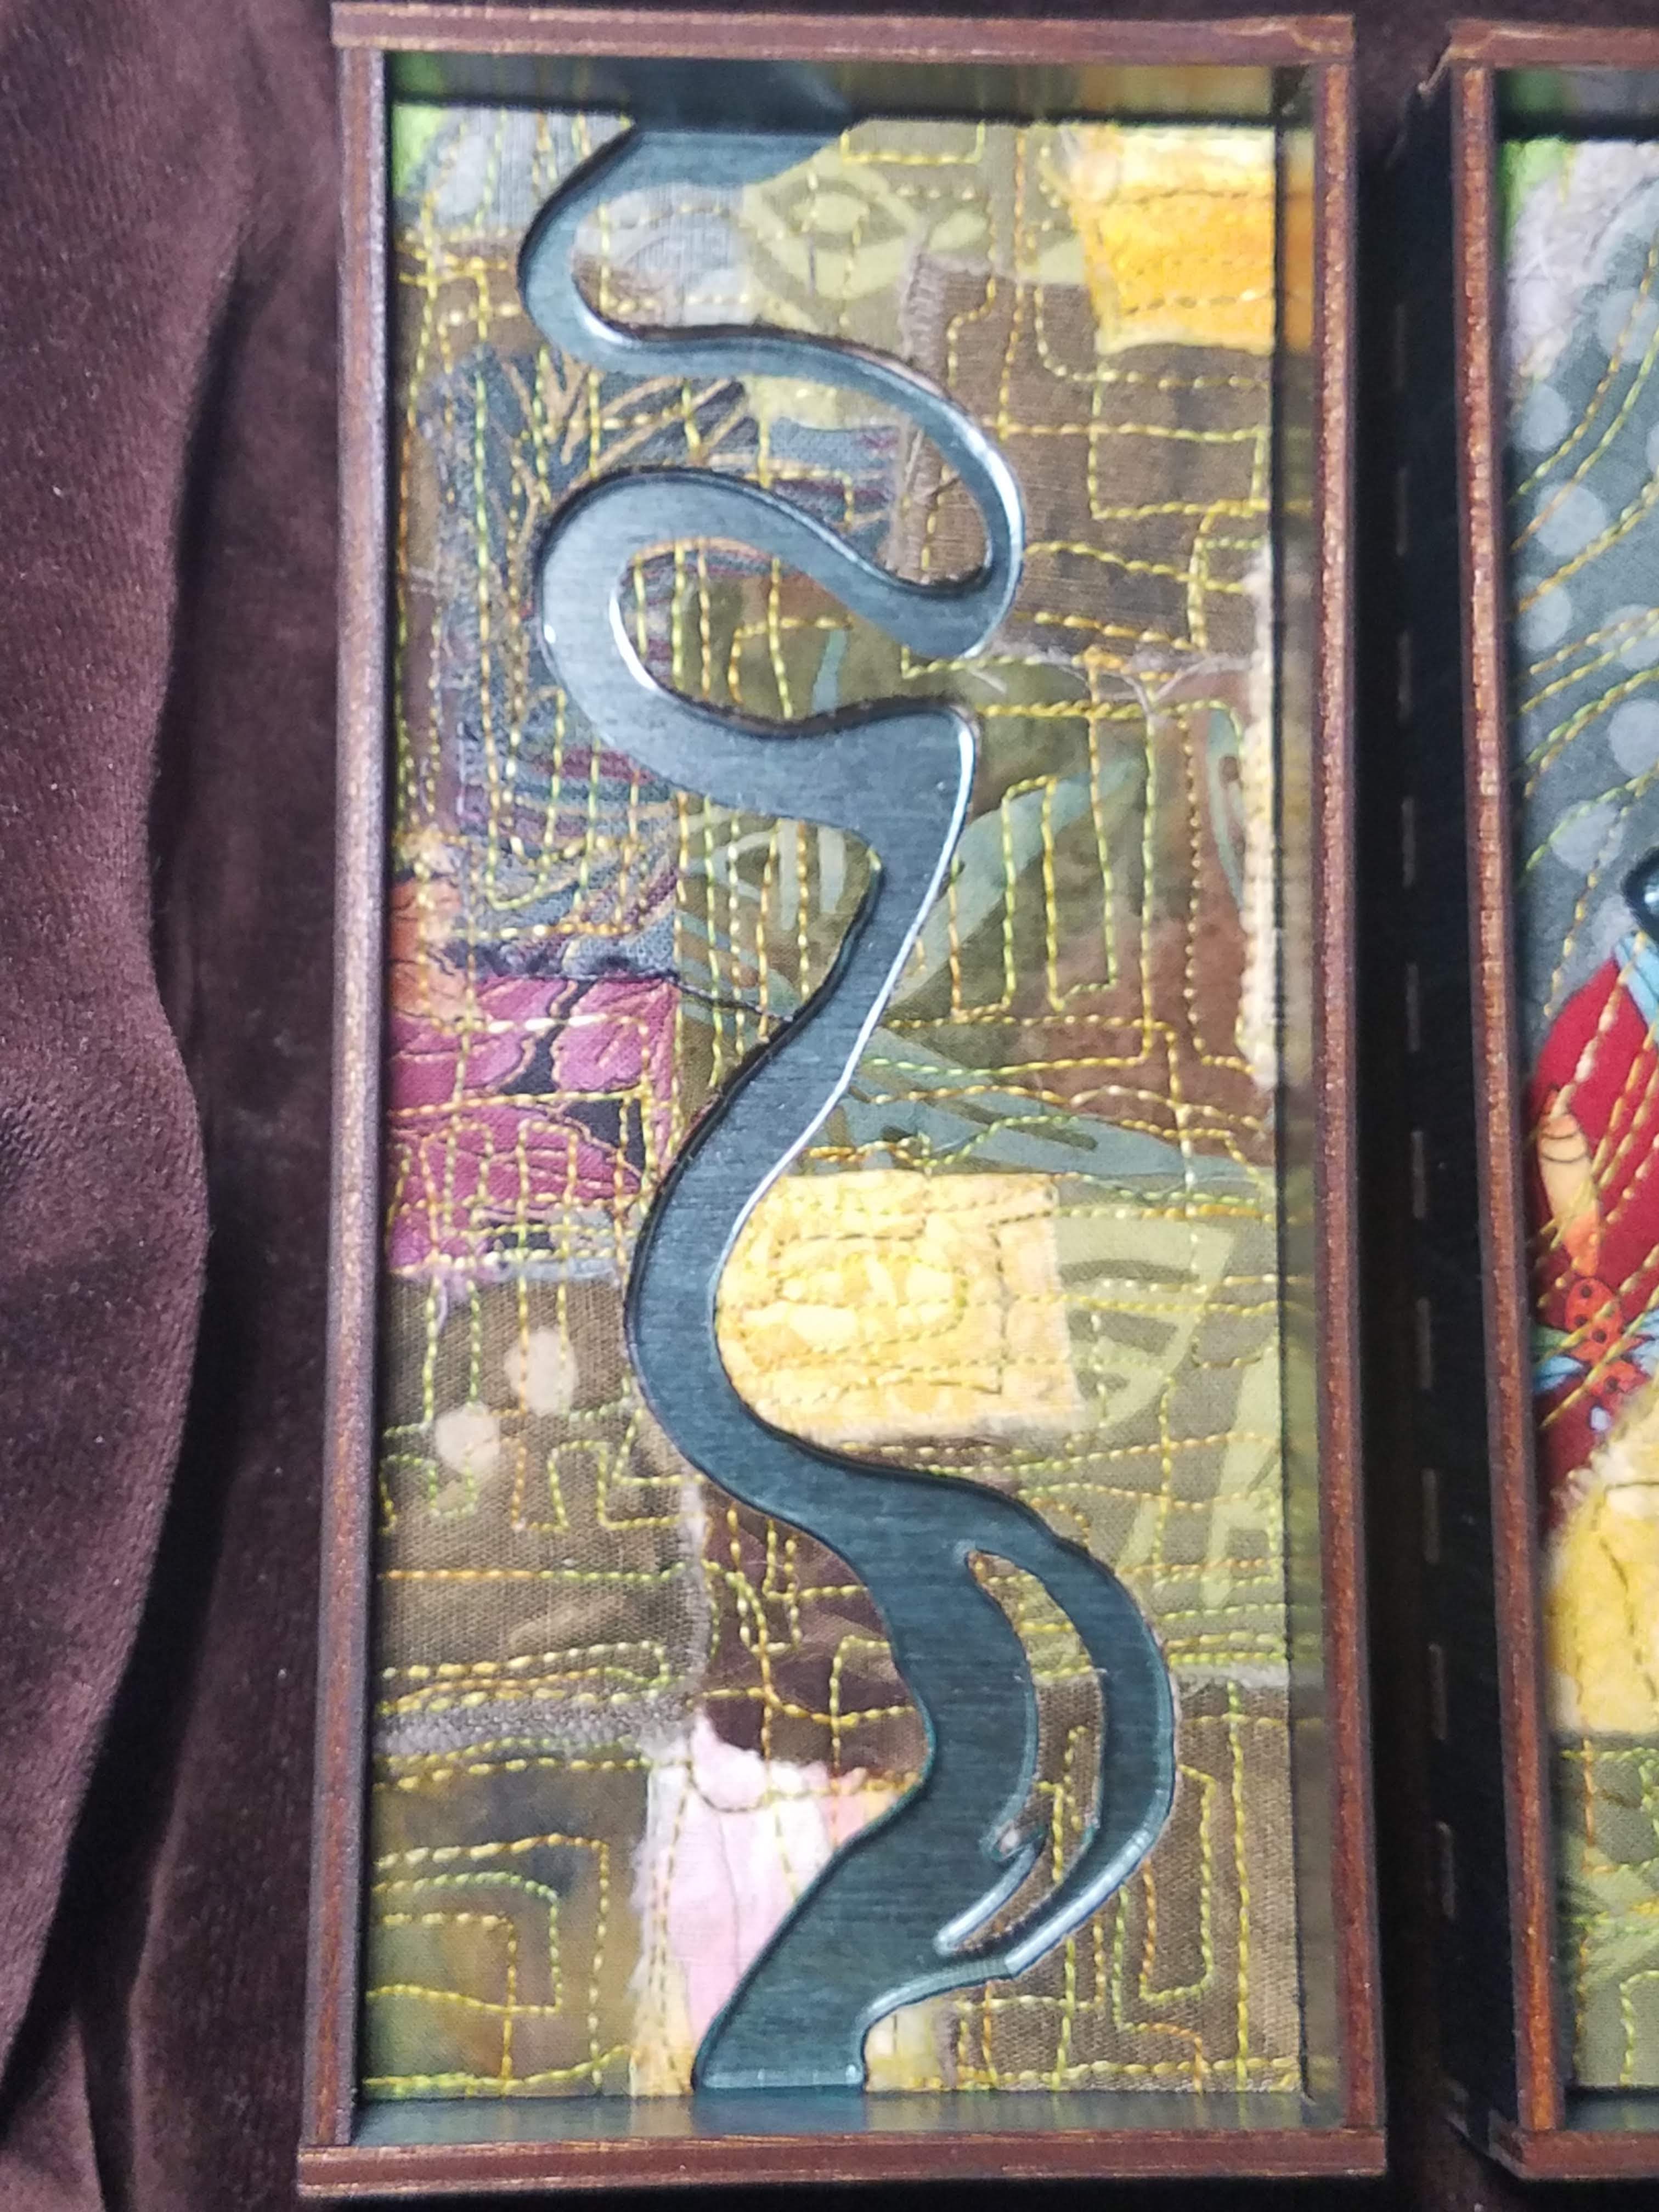
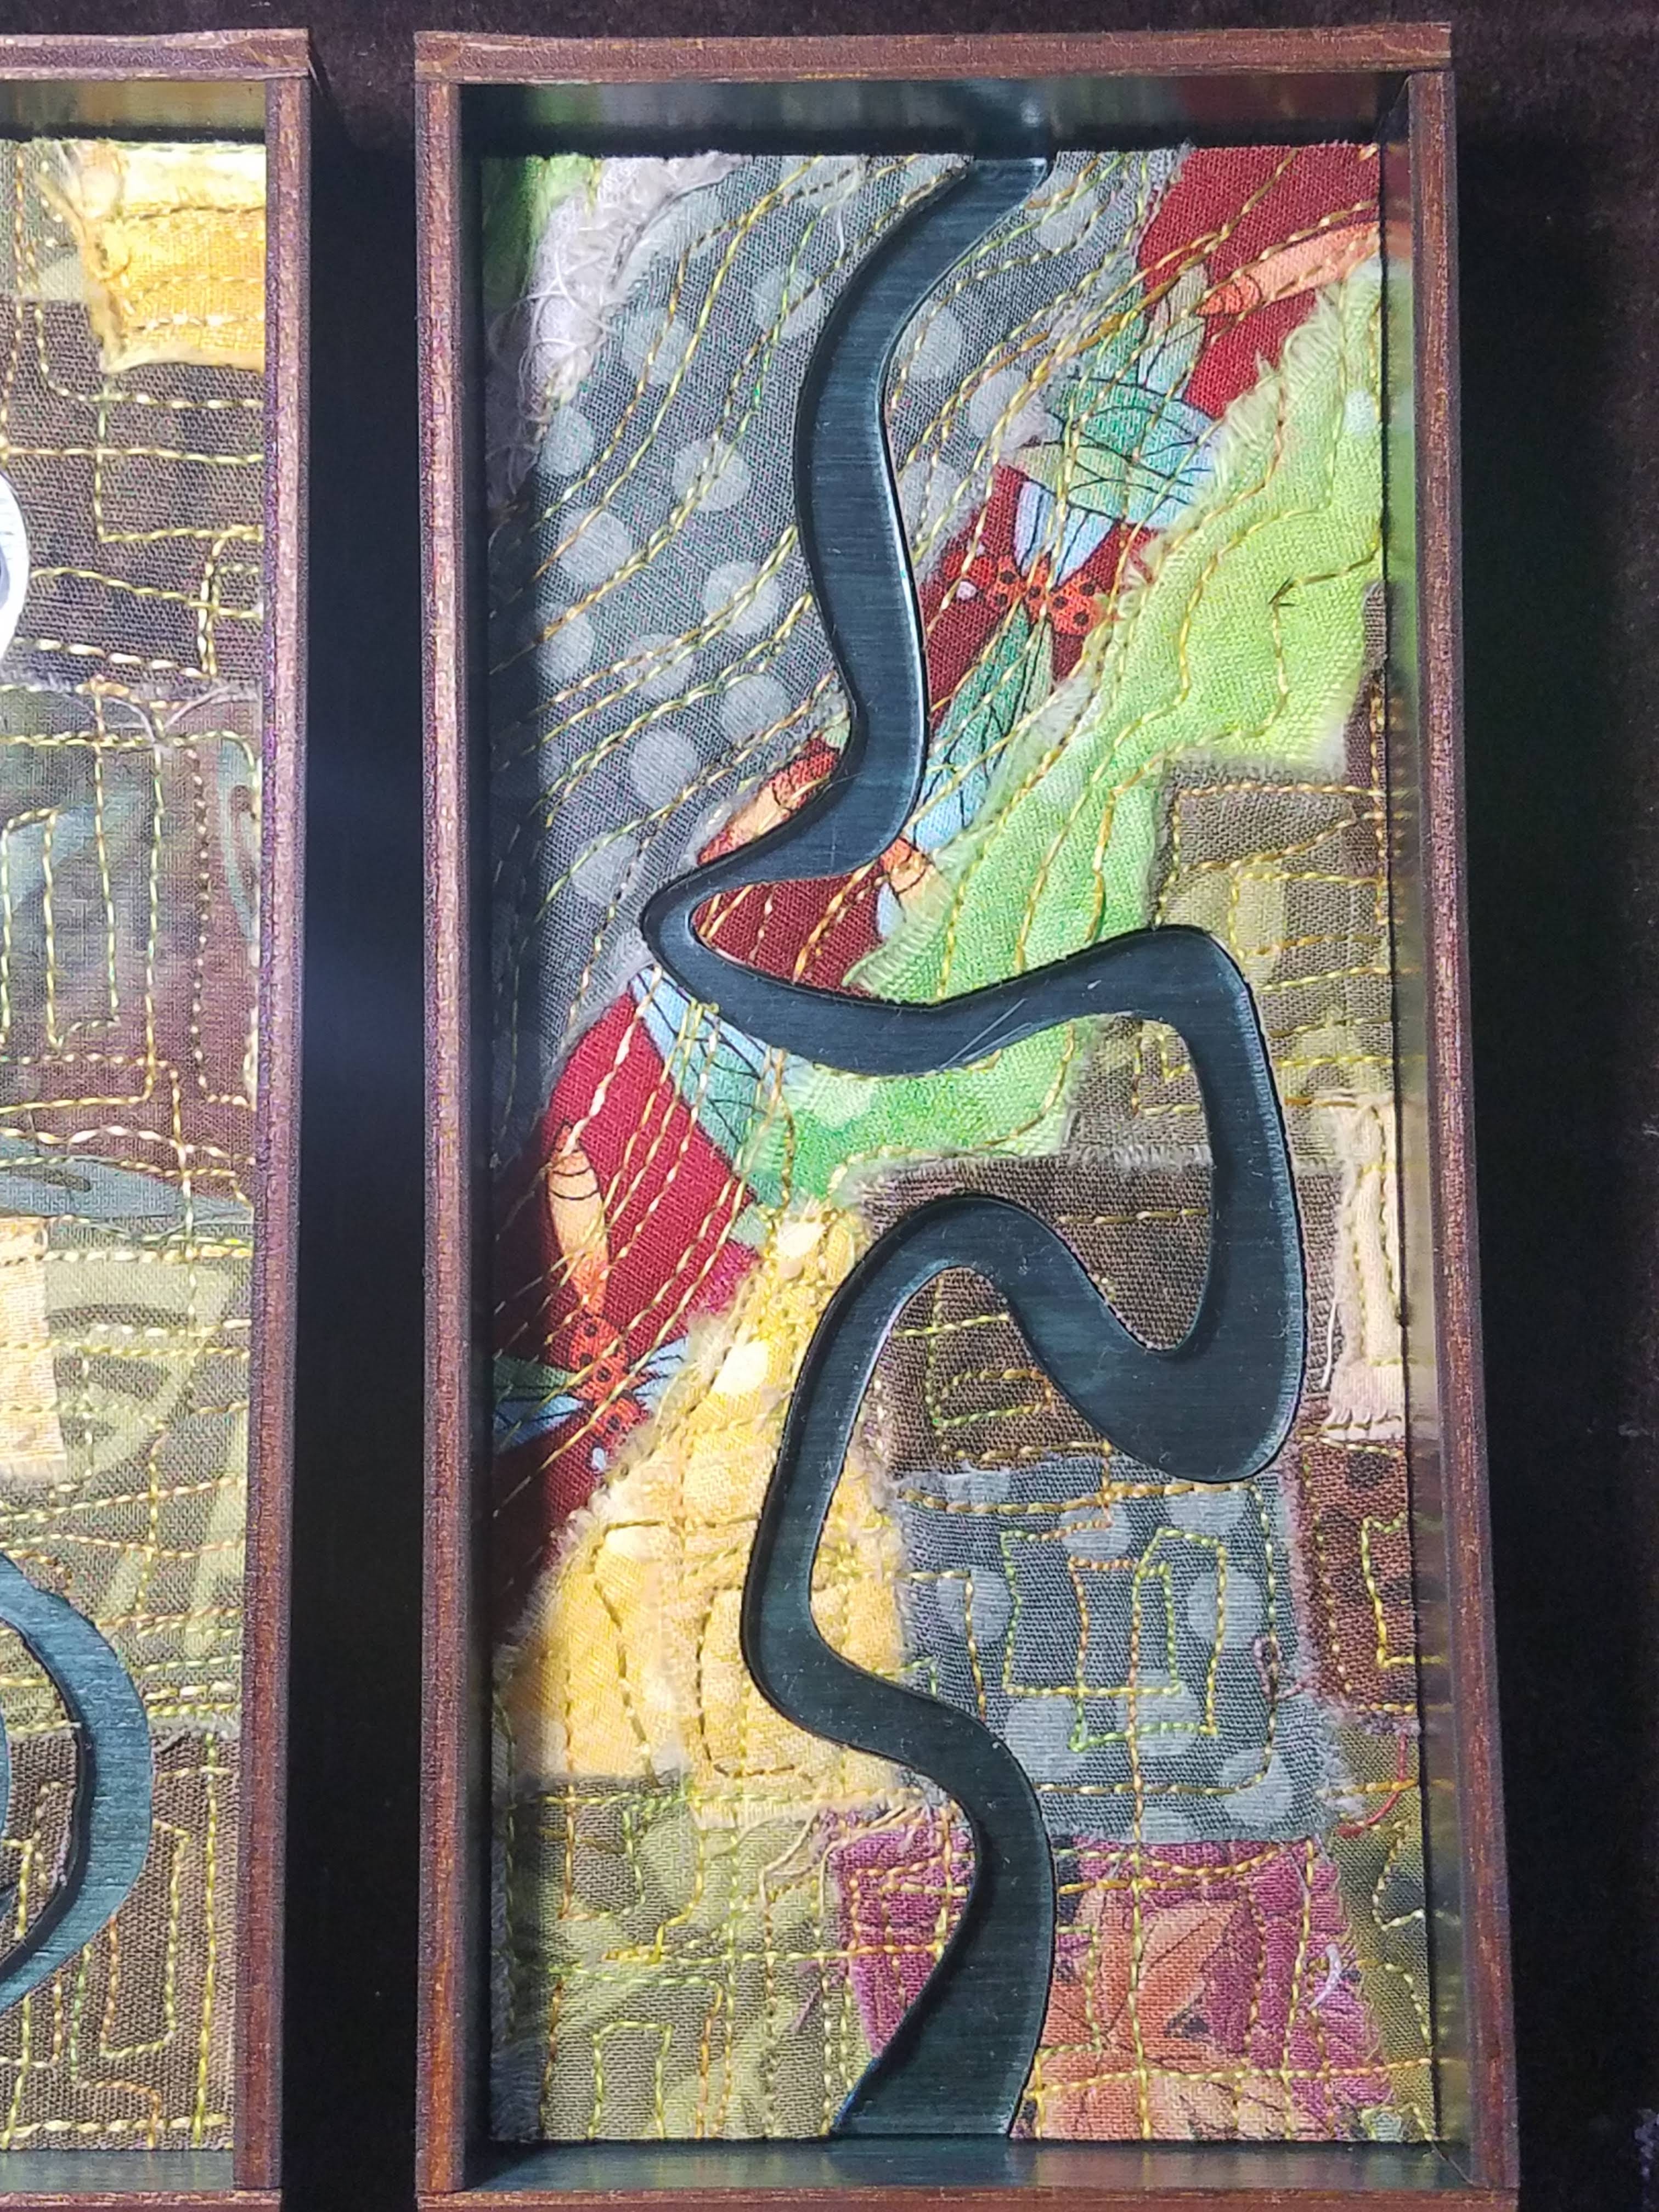
What I was really thinking about was time, and how to demonstrate in a small piece of work the passage of time. But I was also thinking about my father, who is lost in dementia and unsure about a lot of things. He asks me how old he is, and when I tell him (ninety-five) he looks at me aghast. “How did that happen??” he asks. The only answer that satisfies us both is Alice’s answer when I ask her the same kind of thing (“how did you get to be this old already?”). She rolls her eyes, and says in one breath “the relentless, unidirectional passage of time, Mom.” So that’s what I tell my father, and we are both amused until he needs to know that again. Or know something different.

So that’s what I was really thinking of. The relentless, unidirectional passage of time.

skills, materials, tools

I made this yesterday, and it took me two years, plus an afternoon.

It has been two years that I’ve been thinking about the ways I could make use of laser cutting in my work. It has been two years of getting a grip on the software and concepts, the capabilities and limitations of the tool and the materials it could cut. Each time I learned something, my vision of what I wanted to do got clearer.

And so I can make things like this now.

I feel like I am balanced at the top of whole new mountain – gathering my courage to descend into a valley full of ideas and projects.

bench notes: thread weights

There are two paths to apply thread to work. The most used on a sewing machine is top thread – it follows the usual thread path from the spool to the needle, and through the magic of the lock stitch is looped around the bobbin thread and drawn back to the top of the work.

This little video shows clearly all the moving parts that make up a stitch. You can see that the top thread travels through several steps to get to the fabric. It also gets pulled back and forth through the eye of the needle as the take-up releases it for each stitch and takes it up again. This wear can be absorbed by finer threads running through appropriate sized eyes, and a wide range of threads can be used.

In a perfectly counter-intuitive move matched only by the wire industry, thread weights are inverse to the actual size of the thing in question. The 50wt thread on the left, from Superior, is the finest I tend to use because anything smaller than that does not cover the underlying fabric in any useful fashion. The weights increase to 40wt, also from Superior, 30wt, from Sulky, and 12wt from Sulky. All these are 100% cotton threads, and three of the four are also variegated threads.

Once threads are too coarse to fit through the eye of a needle, they can be wound on a bobbin and worked from the back of the piece. I’ll take some pictures of that process and demonstrate in the next bench notes.

bench notes: more thread

I wrote before about threads. This is a small sampler of four variegated threads I use routinely; three cotton, one rayon.

If you look at the samplers, you can see the Valdani and both Sulky threads have a long color change – there is a fair amount of each color on the thread. In close stitching, such as cobbling (small round circles) or small overlapping scribbles this long change gives depth and interest to the area covered. In lines, such as outlining or contouring or sketching, it means that the lines change color or character unless they are repeated, going back and forth over the line brings more different colors to it as well as making it a thicker line.

The King Tut, from Superior Thread, has a short color change, roughly every inch. This makes the thread read more like one color than several, as your eye averages the color within the area. I use these threads to blend different fabrics into a more cohesive mass. Because they are finer than the other threads, I also use them in the mid-ground and background of a piece.

I think the prettiest threads I use are the Sulky Blendable cottons – there are more different colors in one spool, and the patterns are more variable. I use these threads in the foreground of a piece, to keep details in the foreground from becoming an undifferentiated mass.

For a long time, I only knew of and used Sulky Rayon threads. They are easy to find, and come in many solid shades as well as the variegated versions. Rayon has a truly delightful sheen which is especially good for adding details and highlights to a subject, but it can get overwhelming in large areas.

Finding more variegated cotton threads, and variegations in different lengths, has helped my work evolve in a more painterly direction.

Sumac three ways

Sometimes I get stuck on a particular topic. The staghorn sumac berries were speaking to me. I finished the first one, with two colors of velvet providing depth and one variegated thread defining the berries. But!! I was not done! The second piece used one solid color of velvet for the body of the subject, and I added three different variegated threads to shade the shape. The third one I used heavy perle cotton in the bobbin, and worked upside down, over brown velvet. I used two related colors of thread to give lighter and darker sides.

There’s a modern, painterly feel of the first one, and it surprises me how much I like it. The second one has some delicate shading in it, but the background is … busy. The third one feels most like my usual work.

What do you think?

threads

Frequently when I am making a piece, I check the back of it. Many people who see the backs say they are almost as interesting as the fronts (which is a distinctly mixed compliment) and wish there was some way to display both sides of a piece. I am amused by this, because the back is not the art, it is the supporting structure; the backs are more like backstage in a theater where a lot of work goes on to make the front look effortless and tell the story I am trying to tell.

This doesn’t mean I am not delighted with all the visible thread on the back, and on the front. While normally I use fabric for areas of color and texture, and add detail with stitching, sometimes a scene seems to lend itself to line work. For this barn, I pulled out all the gray threads I have, from shiny white to matte black and the in-betweens. Possibly the most unexpected thread I used has alternating sections of white and black, with no in-between shades. The color variation is so short, at one inch, there is no way to control what color goes where, so the resulting shrubbery and grasses look sun-dappled and unexpectedly deep.

While I like many threads for many different reason, I have a particular affection for variegated threads. Varigated thread works twice as hard as regular thread. It carries extra colors into an area, bringing depth and interest. It blends fabric edges, making softer, smoother transitions. I have an entire set of plastic drawers filled with threads, and it is slowly being overtaken by all the different variegated threads I can find.

Three of my favorite threads are Superior, Valdani and Oliver Twist. They all do very different things. Superior’s King Tut is a lovely smooth cotton thread with short, one inch variations. I use this a lot for adding texture to larger areas, and blending pieces together. Valdani makes a wide range of thread sizes as well as color variations. I use the finer threads for increasing depth and interest – since the color changes are longer. They also make perle cotton in gorgeous variations, which I can use in the bobbin when I work from the back. Oliver Twists is a small shop that hand dyes sets of variegated threads in different weights. They are unbelievably lovely and I want ALL of them. They have more colors per strand than anything else I use. Because of the weight and interest (and cost) I use these for emphasis in visually important areas. Also I gaze at them pleasure.

fog

I use frequently use silk to represent water in my work. China silk makes a good sky, and dupioni and noil have a rougher texture that works well for ponds and streams. One of my favorites is silk organza; a stiff, translucent fabric that is easier to work with than other sheer fabrics. Organza is best to add depth and distance, as well as adding clouds, mist and fog.

The above pair of pictures are my attempt to make sense of layers of morning mist my friend Jen captured on her morning walk to her lake. I worked from the background of the picture forward, putting down each layer and stitching in details. On one piece, I left the organza loose, on the other piece I stuck it down with Misty Fuse, a very light fusible web that shows much less behind very sheer fabrics. The two pieces feel very different to me, and I’m not sure I like either of them.

One of my studio rules is: If you love something, do it again; also if you hate something, do it again. I didn’t love either one of these, but I do very much like particular details in each one. I think I have to make a third iteration, using both techniques, and see if I can catch the feeling I am aiming for. My thanks to Timna Tarr for her excellent performance as a rubber duckie* on Saturday.

*I am told, by people who program, that many engineers keep a rubber duckie to explain things to. Apparently describing the problem out loud, to a sympathetic audience, helps locate the problem. This works with someone who understands the problem, someone who does not at all understand the problem, or even an inanimate creature such as a rubber duckie.

Bench Notes

Bench notes are the notes on experiments that I take to remind myself of the steps I took, and what I was thinking, and what I thought the next steps would be. These excursions start when I see a piece of artwork or a scrap of something and my head spins with ideas about how I might translate that to fabric, and whether it would be interesting if I did. This batch started with the images below.

I saw pictures from Guo Pei’s Fall 2019 collection, and I was struck by the construction of the garments. I mean, one model is straight-up wearing a bathtub filled with flowers, which has to be strenuous, while a conjoined dress for two women looks like it could sow dissension between even the best of friends. But the fabrics are amazing, the techniques bear close examination, and these two constructions made a huge impression on me:

The dress on the left, and the sleeves on the right seem to be made from hundreds of fine pieces of silk sewn vertically onto the base garment. The silhouette on the left, in particular, is created almost completely with the shape of the vertical pieces. The idea of sewing something that densely was intriguing.

To begin, I used some pieces of silk dupioni, sliced in wavy lines, and stitched onto straight vertical lines.

Color changes depending on light and orientation. I like the way the edges echo across the piece, like overlapping waves. I forgot that sewing a convex curve to a straight line made the outside edge too short, bending the base fabric. I think the silk needs to be cut more on the bias, to prevent unraveling, and also to add ease to the outside edges.

For a first test, I think I can see some ways to go on the next experiment. Next step:

  • make the stitched edge straight

This makes everything lie flatter, and I miss the movement of the concave edges stitched down with the longer edges ruffling and standing off the page. When I stand the page on edge, instead of flat on the table, the shapes become more interesting.

Some possible next steps then:

  • bias cut
  • make the outside edges more unified – more regular
  • change the weight of the silk? dupioni is fairly stiff, find something more drapey
  • sew in the folded center of a piece? 2x the edges for each seam…

I’ve ordered more silk so I have more raw material to work with!

browns of spring

all the browns I found after some tidying in the studio

I thought I needed more brown fabrics, but in fact, what I needed was to organize and dig through the fabrics I actually own. I found this array of browns and tans, some with gold – I was particularly hoping for brown with gold so it was gratifying to find these pieces.

Then I finished getting the colors down for the spring river piece, and starting stitching on the fields. The outrageous thunderstorm last night prompted an outburst of blossoms and baby leaves all over the trees, so I need to get moving on this to catch the part of spring I am thinking about.

beginning of the spring river piece

archives: Haystack fiber studio 2012

In 2012 I went to Haystack Mountain School of Crafts for a two week course with Marian Bijlenga. It was intense, and lovely, and the food was amazing, and I had a wonderful time. We were working with water soluble stabilizer, making fabric out of thread and strange objects and thin air.
water soluble one

coiled twigs, pinecone sections, stitched velvet circles


water soluble two

velvet scraps in thread grid


thread landscape

coastline study, perle cotton, invisible thread

Before I left for Haystack, I was having trouble sleeping, and having stress dreams about not fitting in, not having the skills I’d need… Eventually I had a soothing dream about going to the shoreline, and choosing rocks, and sewing little velvet coats for them. When I got to Haystack, I was fine. I had all the skills necessary, and wonderful people in my studio to work with and share with. But my dream of little coats for rocks stuck with me, and I made several.

And when I got sick of velvet, I made some lined linen jackets for more beach rocks.

white velvet jackets for rockssilk lines linen jackets for rocks


The application of whimsy is almost always a good plan.